- Categories :
- More
Categories
How to Install Metal Balusters
By:
 Stair Warehouse
| Published 07/20/2026
Stair Warehouse
| Published 07/20/2026


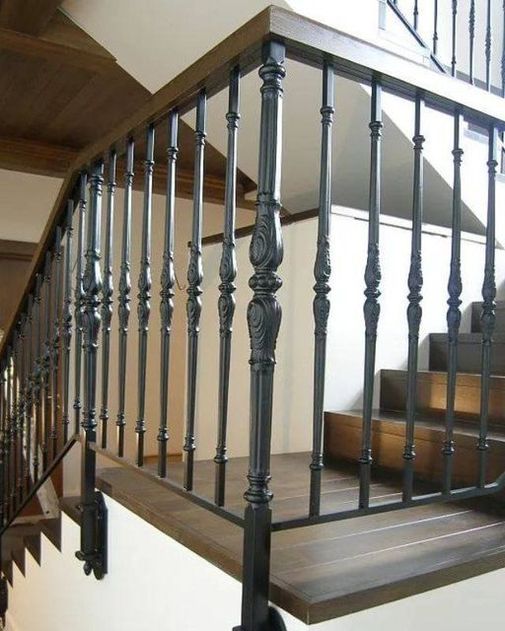
Metal Baluster Installation Guide
- Remove Existing Wood Balusters
- Cut wood balusters in the middle and remove the top and bottom sections.
- TIP: Wood balusters can be attached in different ways:
- Toe-nailed into place
- Fitted into a handrail hole with a dowel in the floor
- Fastened with a double-ended baluster screw
- Dovetailed into the tread (common in older homes)
- If a baluster won’t come out, try rotating counter-clockwise. For dovetailed balusters, either cut flush with the tread or remove the mitered tread end to knock it out.
-
Drill Installation Holes- Check the existing holes if reusing the original wood baluster locations.
- Hole sizes:
- 1/2" square balusters → 3/4" holes
- 9/16" square balusters → 7/8" holes
- Drill handrail holes at least 1-1/2" deep and bottom holes 5/8"–3/4" deep.
- Some balusters have a turned round top, which may allow for a slightly smaller drill bit and installation without a metal shoe.
- TIP: Drill and test-fit one baluster before drilling all holes.
-
Adjust Baluster Spacing (if needed)- Local building codes or safety concerns may require different spacing.
- 2006 IRC Code: Gaps between balusters must not allow a 4" sphere to pass through.
- If moving balusters, existing holes may need to be plugged with tapered wood plugs and sanded flush. Refinishing may be required.
-
Square Hole Method (Optional)- Metal balusters can be installed without shoes by making the holes square and snug to avoid visible gaps.
- After drilling, square the hole sides with a chisel.
-
Cut Metal Balusters- Measure the distance from the floor/tread to the handrail.
- Cut each baluster 1-1/8" to 1-1/2" longer than the measured distance.
- Keep the ornamentation near the top intact — cut from the bottom.
- Tools: metal chop saw with abrasive blade, metal band saw, jigsaw, or grinder with a metal cutting blade.
- Measure each location individually to ensure correct lengths.
-
Test Fit One Baluster- Insert a cut baluster into the handrail hole and align the bottom with the floor/tread hole.
- Ensure enough length is extended into the handrail.
- Adjust hole diameter or depth if necessary.
-
Install Metal Balusters- Slide the metal shoe onto the baluster and tape it out of the way (shoes are cosmetic, not structural).
- Apply epoxy or polyurethane adhesive into the top and bottom holes.
- Insert the baluster and, if using shoes, add adhesive at the bottom and slide the shoe into place.
- Square the baluster and shoes, then leave undisturbed until the adhesive cures.
- TIP: We recommend Stair Warehouse epoxy — it’s 100% solid, doesn’t shrink, and comes with a special mixing tip for a clean, precise application. An epoxy gun is also available for easier use.
Comments •


Related Blogs: Home & Garden
How to Install Metal Balusters
How to Attach a Vent Hose to a Dryer Vent

Outdoor Fireplaces | Warm Up Your Deck or Patio with a Gas Fireplace
Why Choose Weiss Air Conditioning & Plumbing?
Oversized AC Units and Water Heaters are Ruining Your Comfort

Should You Repair or Replace Your Air Conditioner in Montgomery, TX?
Tankless vs. Traditional Water Heater: Which is Right for Your Family?
What is a Mini-Split AC?
